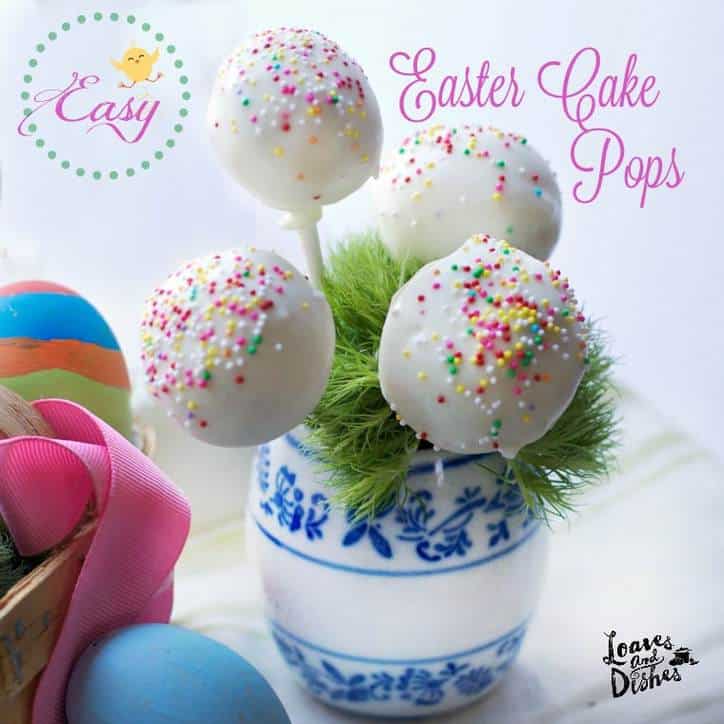
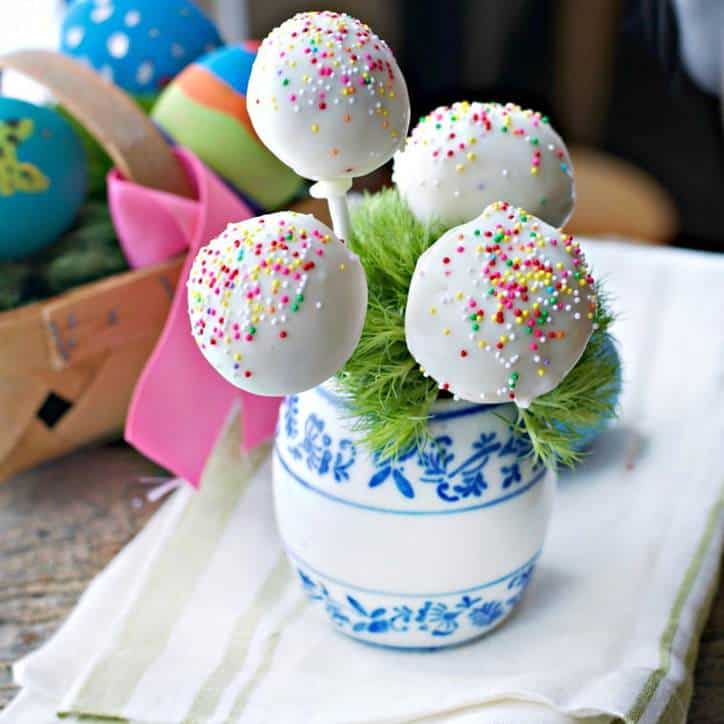
EASY! FUN! and READY IN A FLASH! These Easter Cake Pops are a SUPER SIMPLE Cake Pop Recipe!
Enjoy them in all shapes and sizes for an Easter Desserts and you can use cake pop molds or without cake pop molds, your choice!
Why This Recipe Works....
- It's EASY!
- Uses cake mix, chocolate melts and sprinkles. So FUN!
- Best Cake Pop Recipe Ever!
- Lots of variations you can try!
Here's How You Do It...
Step 1.
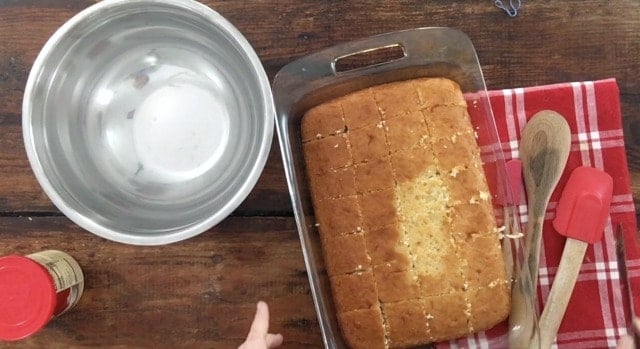
Bake a Box Cake Mix According to the Directions. We like to use a Vanilla Cake so that we make a Vanilla Cake Pop Recipe!
Step 2.
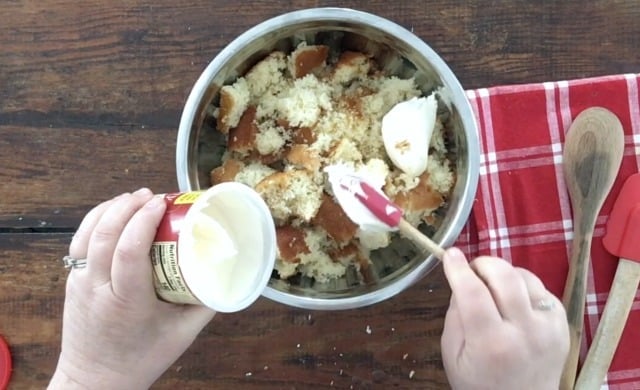
Crumble up the Cake and mix it with a jar of cream cheese icing. Then put it all in the refrigerator and let it sit over night.
Step 3.
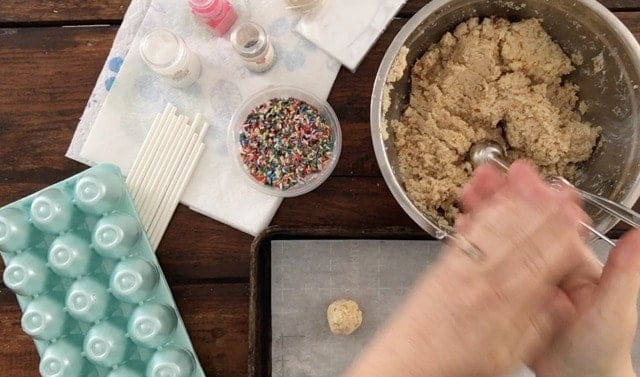
Roll the cake mix into golf ball size balls and place onto popsicle sticks and set aside.
Step 4.
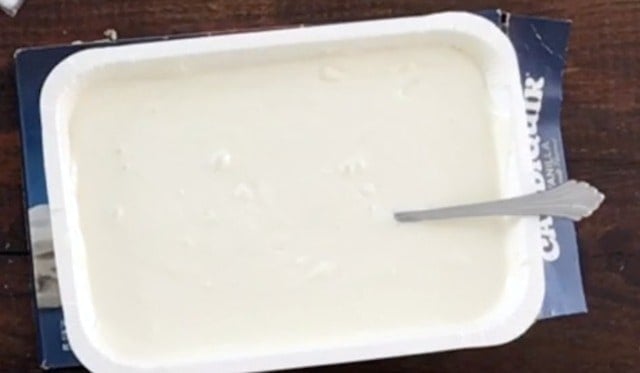
Melt the chocolates in a microwave safe bowl on high in 30 second intervals.
Step 5.
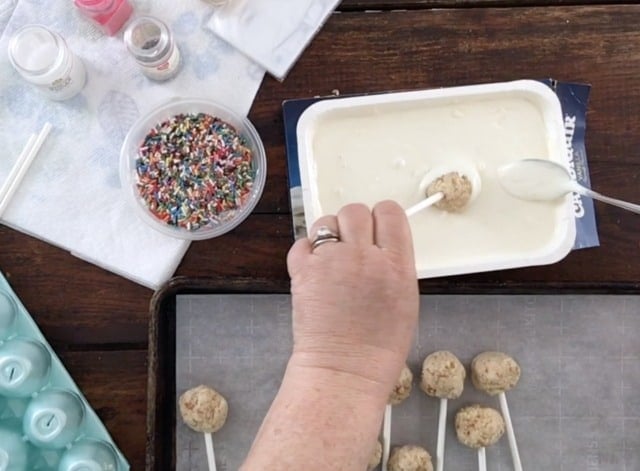
Roll the cake pops in the melted chocolate, covering well. Sprinkle with sprinkles of your choice and allow to cool. Use a specially designed stand OR do like I did and use an upside down egg carton to hold the cake pops!
Frequently Asked Questions (FAQ's)
Are These Cake Pops Just For Easter?
Absolutely NOT! While these are perfect Easter Desserts, they also work for ANY occasion where you just need a little nibble of delicious cake!
Do I Need to Use a Cake Pop Mold?
You CAN use a cake pop mold if you want. You'll find those at most large retailers like WalMart or Target.
However, you'll do just as well making cake pops without a mold too! Simply use a small food scoop to make sure you have even amounts for each one.
Can I Make Cake Pops Without a Stick?
Yes! Of course you can!
Simply cover them well with the melted chocolate and dry on a rack or piece of parchment paper and then dab a little chocolate on any spots that are missing a cover before serving.
Can I Make Cake Pops With Leftover Cake?
Yes! Absolutely you can! If the cake has icing on it already then you will need to estimate the amount of cake relative to the amount of icing.
This recipe calls for one full cake recipe and one can of icing in a 1:1 ratio.
If you have half a cake left over and used a full can of icing on the cake, then you shouldn't need to add any icing!
Can I Make these Easter Cake Pops with Chocolate Cake?
You KNOW it! Have fun with lots of different combinations of cake and icing. Just be sure to keep that 1:1 ratio of cake to icing! 1 Full Cake Recipes to 1 Jar of Icing.
Tips and Tricks for Easter Cake Pop Recipe!
- Be sure to refrigerate the cake and icing mixture. This firms up the mixture and makes it easier to roll into balls and for the balls to stay on the sticks!
- Use a small scoop to dip out the icing to ensure equal sized balls.
- If you don't have the sucker sticks to use, you can improvise with BBQ skewers (cut them into sucker length sticks and be sure to remove the sharp end).
- It's no problem at all if you can't find the candy melts, instead use the quick melt chocolate!
- Don't want to use a stick? That's fine! These are the cutest little Easter Bon Bons without a stick!
- Once the chocolate is dry, you can cover with a small cellophane bag and tie with a cute ribbon! If you don't have cellophane bags, a plain plastic sandwich bag works too!
- Candy Quick works for the outside shell too! Just understand that Candy Quick is thicker and heavier and will make the cake pops fall apart easier.
- The Cake pops will WANT to fall apart while you are putting the outside shell on. Be very gentle with them. Make sure that the chocolate is as thin as possible. You might have to warm it back up to make it looser. Make sure that your cake filling is as cold as possible, this might mean that you stick it in the freezer for a short while to get colder.
PRO TIP: If you would like for the inside of your cake pop to be a colorful Easter color, use a little food coloring to make it a fun spring color!
Supplies You Might Need...
These are the typical supplies you might need to make these wonderful little Easter Cake Pops. I used the sucker sticks. As I noted above, all of this is optional. These supplies will also be available at most large retailers in the party section. (Check Target and WalMart).
These are Amazon affiliate links. If you click the photo, you'll go straight through to Amazon so that you can compare prices. Loaves and Dishes DOES receive a commission if you should purchase. So, Thank you. The commission does not change your price, however.
These are the sucker sticks. You can also use a BBQ skewer, cut into pieces. Be sure to remove the sharp end. You can also use popsicle sticks.
This is a cake pop mold. You can use a small food scoop instead. That works just fine too.
This is a cake pop holder. Use it for a party or to allow the chocolate to dry on your cake pops. If using to dry the chocolate, an upside down egg carton works fine too.
These are small bags to cover the cake pops when complete. You can also use small plastic sandwich bags.
If You Enjoyed This Recipe, You Might Also Enjoy...
OR Try ANY of these Recipes in Our SWEETS Section
Ya'll Be Sweet and Help Me Out, OK?
It sure is a big help to me when you leave me a 5 STAR COMMENT 🌟🌟🌟🌟🌟below in the comment section. I appreciate it so much!
Please also sign up for my weekly newsletter and join me on social media!

Easter Cake Pops
Ingredients
- 1 Cake from box mix, prepared per box instructions
- 8 oz cake icing Cream Cheese Variety is best
- 1 bag melting chocolates
- Candy sprinkles
Instructions
- 24 Hours before you plan to make the cake pops, bake the cake per box instructions. Once baked, crumble and mix well with the cake icing. Refrigerate until ready to make the cake pops.
- Remove the cake mixture from the refrigerator when ready to make the cake pops. Using a small food scoop or cake pop mold, roll the cake pops into golf ball size pieces.
- Place a sucker stick in the bottom of each ball sticking it about half way through the ball. Set these aside.
- Melt the chocolates in a microwave safe bowl on high temp, stir every 30 seconds until completely melted.
- SPECIAL NOTE: At this point, you will want to put something down under where the cake pops will set up. The chocolate is drippy and sticks to surfaces. Wax paper, parchment paper or newspaper underneath will work.
- Dip the cake pops into the chocolate to cover well. Sprinkle with the sprinkles of your choice and allow to cool.
- If you have the cake pop holder that holds each cake pop separately, then do that. If not, turn an egg carton upside down and poke the sucker sticks through the styrofoam to hold them till dried.
- Once dried, you will want to cover the cake pop with a cover like a cellophane bag or plastic sandwich bag. Tie with a cute ribbon.
Notes
- Be sure to refrigerate the cake and icing mixture. This firms up the mixture and makes it easier to roll into balls and for the balls to stay on the sticks!
- Use a small scoop to dip out the icing to ensure equal sized balls.
- If you don't have the sucker sticks to use, you can improvise with BBQ skewers (cut them into sucker length sticks and be sure to remove the sharp end).
- It's no problem at all if you can't find the candy melts, instead use the quick melt chocolate!
- Don't want to use a stick? That's fine! These are the cutest little Easter Bon Bons without a stick!
- Once the chocolate is dry, you can cover with a small cellophane bag and tie with a cute ribbon! If you don't have cellophane bags, a plain plastic sandwich bag works too!
- Candy Quick works for the outside shell too! Just understand that Candy Quick is thicker and heavier and will make the cake pops fall apart easier.
- The Cake pops will WANT to fall apart while you are putting the outside shell on. Be very gentle with them. Make sure that the chocolate is as thin as possible. You might have to warm it back up to make it looser. Make sure that your cake filling is as cold as possible, this might mean that you stick it in the freezer for a short while to get colder.
- SPECIAL NOTE: You will have some individual fails with this recipe, it's the nature of cake pops. Some will come apart. Those are the ones that you are supposed to eat while you are making this recipe. 🙂
Nutrition
***This recipe originally posted to Loaves and Dishes on February 29, 2016 and it has been updated with new information, pro tip, video, step by step shots and the recipe has been updated with new information and better instructions***
A VERSE TO SHARE
Considering the Easter Season, I thought this a fitting verse to share. There isn't much to add to it either. Thankfully. 🙂
Matthew 28:6
He is not here; he has risen, just as he said. Come and see the place where he lay.






Moxie says
So fun to do!
Hafsa says
wonderful recipe ! thanks for sharing 🙂
Wendi Spraker says
Hey there! Thank you!
Wendi Spraker says
Thank you so much!! Yes, Sarah's Iggi is usually very curious about what we are doing when there are food photos involved!! Although having him sit still enough to have his own photo made is another story. I'll tell Sarah that you stopped by!
Cakespy says
This is basically the cutest post ever. I love the batman pic, and my little pug (I call him ninja pug) is getting up in my baking grill all the time just like that!! I love these springy, happy, cake pops.
Ally says
The cakepops look delectable and I love the wedding photo with the Batman unveiling---tres cute & unique.
Wendi Spraker says
Hi Ally! Thanks for visiting!!! I'll let Sarah know that you stopped by so that she can respond! I agree. Fun and cute!
Sarah says
Thank You Ally! The cake pops are very yummy! Let us know what you think when you try them!
Mary says
No express lane for me...thank you very much! I love the chatting, photos, tips and tricks. Beautiful wedding photo, love when you husband exposes his secret!!! LOL! The Meyer Lemon cake mix sounds to die for, will have to look for that. I love cake pops...portion control, people! Pinned. Making asap...maybe sharing???? Have a Happy Marriage, and yes you always find new and wonderful things about each other.
Wendi Spraker says
Awwww. Mary that's so nice!! I'll tell Sarah that you left her a comment so she can respond. :). You are always so kind. 🙂
Sarah says
Thank you so much!!! Hope you enjoy the cake pops!! They are delicious!!