With summer upon us, it totally makes sense to inventory emergency supplies, right? Summer whirls up all kinds of things but especially tornados and bad storms. That moves us right on into the hurricane season and before you know it, fall arrives with pending winter time storm outages. Anytime is a good time to be prepared AND LEARN HOW TO SET UP AN EMERGENCY KITCHEN BOX
Today I’m going to share HOW TO SET UP AN EMERGENCY KITCHEN BOX. An Emergency Kitchen Box comes in handy often. You can even plop the whole box in the back of the truck and head out camping. Afterall, everything you need is in there. Hopefully, any emergency you have will look more like this than an emergency!
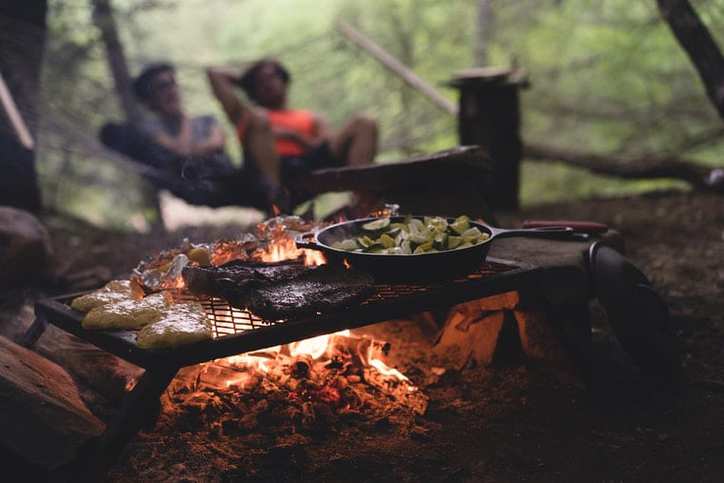
I found myself digging out my Emergency Kitchen Box just a few weeks ago when our meter base blew up and our power was out for several days. Because of the EMERGENCY KITCHEN BOX, our family didn’t end up spending a ton of money eating out. We simply plugged into the generator for the refrigeration and cooked what we wanted with our EMERGENCY KITCHEN BOX and pantry supplies.
The best part? You can be ready too!
As a nurse and a town council person and someone who has had numerous emergency preparedness trainings through my work, I can say without hesitation, you will never be sorry if you do even the most basic emergency planning.
If you are looking to simply be ready to feed your family in case of a power outage. Perfect. This box is for you.
If you are looking for a way to store kitchen necessities for long term needs, good, this box is STILL for you. Personally, I have camped out of my box for more than 2 weeks at a time and other than restocking the usable items, no problems.
This article has a printable checklist to help you prepare for the simplest of emergencies. I have included affiliate links to Amazon so that you can check the items out yourself. Check into the prices though before you purchase, you might find a better deal closer to home.
BEFORE LEARNING HOW TO SET UP AN EMERGENCY KITCHEN BOX
The first thing to consider before even thinking about a kitchen box is: WATER. Water is essential to life. Honestly, if the power is out, you probably have enough food to keep you going (crackers, popcorn, sandwiches, cereals). Water is another story.
You really need water and you need water as part of this emergency kit as well. I like to keep water in these blue jugs for use in my Emergency kitchen. There is a handy spout on the bottom so that you can easily pour. It sits right on the edge of a picnic table or on the edge of the kitchen sink and is ready for everyone to use to wash hands, get a drink, get wash water, etc.
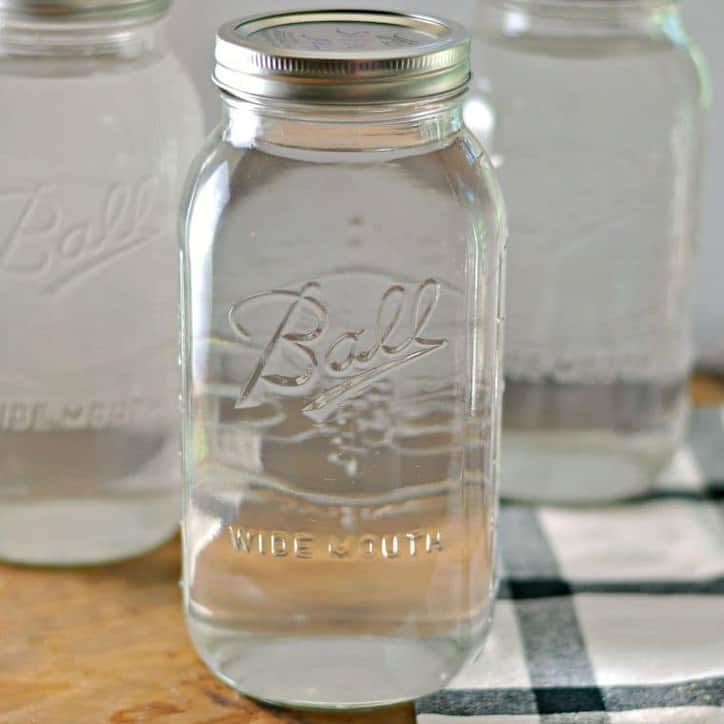
I have also written an article on Canning Water for Emergencies. You can find that HERE.
THINGS TO CONSIDER FOR HOW TO SET UP AN EMERGENCY KITCHEN BOX
The first thing to consider is: How will you cook? You might already have in mind that you would cook on your grill. Great idea. Make sure that you always have at least one extra FULL propane cylinder available. The last thing you want is for the propane to run out and you not have a way to fill it. One of the first things to run short in a disaster is propane.
Perhaps your grill requires charcoal. Again, make sure you have plenty of charcoal. I mean plenty. Where are you going to store all of that charcoal? How will you keep it dry?
DO YOU SERIOUSLY KEEP A WHOLE BOX READY?
In short, Yes! I keep a large plastic tub that has a locking lid. I'm including a photo here that is clickable through to Amazon so you can see the price - but seriously - just go to your local Dollar Store and pick one up. In fact, at my local Dollar General, if you buy something during the week, the register spits out a coupon for $5 off of $25. So, take your coupon and go on the weekend and get a box like this and a few other things you need with that great coupon! This link is for a 4 pack - pricey - but I just want you to know what I'm talking about.
I use a Sharpie marker to write "Emergency Kitchen Box" on the outside - because in an actual emergency you need clues like that. Being nervous makes all of us overlook obvious things easily.
CAMP STOVE
My emergency box contains my Coleman Propane camp stove as well as several small bottles of propane. It is easy to contain and everything I need is right there in one handy box. A single small propane bottle will run for hours. Propane canisters are available at places like WalMart, camping stores, Target, etc. They are NOT available on Amazon.
My estimate is that I can cook 10-15 full meals on my camp stove on a single bottle. So - 2-3 bottles of propane should last 2-3 weeks in an emergency situation. Realistically, you can’t have TOO MANY bottles of propane in an emergency. Besides, they last forever, literally.
You do want to make sure that you keep them away from sparks, keep at less than 120 degrees, keep away from kids, don't store in your living spaces and just know these cylinders aren’t refillable.
When you store your camp stove, if you still have propane in the bottle, simply unscrew it from the stove and place the little cap back on the top. It will save for next time.
Here is a photo link to exactly the camp stove I have. - you can click the photo to see prices etc.
SOLAR OVEN
This solar oven is a new addition to my emergency kitchen stash. (Just fyi - it doesn't really fit inside the plastic tote - so it sits on the floor nearby). In the event of a power outage, I can cook on my grill or on my camp stove, but I certainly can’t bake anything. That’s fine for a while, but many of my canned and stored food items go with recipes for baked items - that poses a problem.
This solar oven will do the job. It is high quality and sturdy. You will find if you go searching that there are A LOT of solar ovens out there. Many are just flimsy papery fall apart items. That isn’t the way I play this game. I figure, if I am roughing it through a power outage, then I certainly want a quality item that I know I can depend on.
All this solar oven requires is sunshine and the oven. Essentially any item you can bake in the oven, you can bake in the solar oven. You can cook everything from bread to casseroles to pot roast.
The nice thing? This solar oven doesn’t have to wait for a power outage to go to work for you. Simply set it out on the deck on a sunny day and let it save your energy dollars by cooking your dinner for you.
I hope to be including some delicious solar oven recipes at Loaves and Dishes soon - keep your eyes peeled! (Click the photo to see prices).
DUTCH OVEN
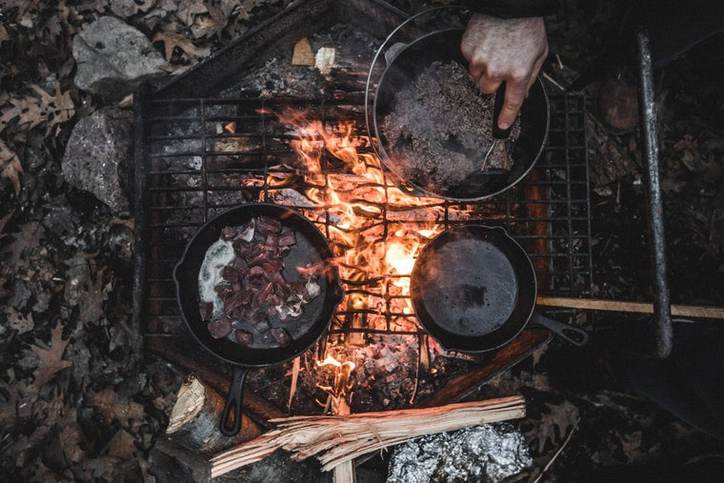
Again, if the power is out, I can cook a lot of things on my grill. I can cook a lot of things in my solar oven. What if the propane runs out? What if it is a rainy WEEK? The solar oven is no good on rainy days. I have this cast iron dutch oven that can be used on a campfire for just in case.
The booklet that comes with it explains exactly how to use it. Down to the number of pieces of charcoal that must be laid on the lid and underneath. Can you imagine the delicious stews and soups that could come from this pot? How about breads and other yummy stuff!
Something that I didn’t realize when I bought this pot - it works best with a tripod and you will want the hook to lift the lid. You will also want some SUPER DUPER pot holders - just saying.
COOKING SUPPLIES
In my cooking box, I have a large resealable plasticware pan that holds all of my kitchen utensils. I’ve included a checklist of these items in the printable below.
The main idea (and beauty) of the large plasticware box is that it has double duty. Each meal, the box is mostly cleaned out because most of the items are used for meal prep or eating. The box becomes the dish pan for washing the dishes. Once the dishes are rinsed and dried, they all go back in the box for storage.
OTHER ESSENTIAL KITCHEN SUPPLIES
DISHES
Let’s face it. You won’t be eating off of fine china while you are roughing it. In fact, my experience has been that it is best to use dinnerware specifically made for this purpose. I like these graniteware dishes the best. They clean up easily, are just the right size, stack well and don’t take up a lot of room.
The negative? If you put hot coffee in the graniteware mug, you will burn your lips. Guaranteed. You need a plastic mug for coffee. The graniteware mugs work well for soups or something you will eat with silverware.
SPEAKING OF COFFEE
You might not consider coffee a survival food. I do. In fact, I think of it as a way for my family to survive. Seriously, no one would survive me without my coffee. So, I include a percolator in my emergency supplies. At this moment, as I write, my emergency box contains a cheap $10 flea market aluminum percolator.
Think about that - do I really want to be drinking aluminum saturated coffee while waiting through an electrical outage? Ummm.. nope.
I had the opportunity to use a nicer stainless steel unit while vacationing in Charleston recently and I am replacing my cheapo one with this. This is super nice, heavy duty and will probably last a lifetime. If I were going to use it for daily use, I would order a glass bubbler for the lid - but since this is going in my emergency supplies, the plastic bubbler is better suited.
As with most things, I wish I had researched this more carefully before I purchased the cheapo one because the really nice one isn’t even that much more expensive.
MORE ON COFFEE
Also - just in case - we have a hand crank grinder in the emergency box. Mr. Loaves and Dishes recently gave me one similar to this that he found at an antique store. If you like whole bean coffee - then you will definitely need one of these. JUST NOTE: It takes A LONG TIME to hand grind enough coffee for a full pot. Not for the faint of heart.
WHAT DO I PUT IN THE RESEALABLE PLASTICWARE BOX?
Here is what I keep in my box. Of course, yours may be a little different. I try TO AVOID any item that is a specialty item. For example - butter knives, great for spreading stuff - but realistically I can use a steak knife for that and the steak knife works for cutting things too.
There are no links to these because I am going to assume that these are items that you........
1. Know what they are and
2. Either already have and can spare some extra for your box or
3. Can find very affordably at yard sales, dollar stores or at thrift outlets.
Please don't spend a lot of money on these items - but do get decent quality. You certainly don't want something that will break the first time you use it.
Do NOT bother to write these all down. There is a handy printable at the end that you can use. Simply print it off and keep a copy with your emergency things. I recommend laminating it and using a grease pencil to mark things off. Then you can wipe it off and start again if you need to.
Basic List for the resealable plastic box:
- 4 metal forks
- 4 metal teaspoons
- 4 sturdy metal steak knives
- 4 reusable cloth napkins
- 2 large serving spoons
- 1 8 inch chefs knife
- 1 small cutting board
- 1 metal spatula
- 4 good absorbent cloth kitchen towels
- 2 kitchen dishcloths
- 1 scrubby
- 1 can/bottle opener
- 1 small ball of kitchen string
- 4 rubber bands
- 1 small bottle of dish soap
- 1 rope to make a clothesline out of for the kitchen towels.
- 6 clothespins
- 1 set tongs
Additional items to include:
The following items don’t necessarily need to go in the smaller plasticware box. These items simply need to be in the larger emergency box. In the event of a long term emergency, they would run out fast, but certainly should have a place in your emergency box for short term emergencies:
- Quart size resealable plastic bags
- Gallon Size resealable plastic bags
- Heavy Duty aluminum foil
- Roll of paper towels
- Contractor size heavy duty trash bags
- A quart size resealable bag with laundry soap in it (so you can easily wash your dish towels and napkins).
COOKWARE
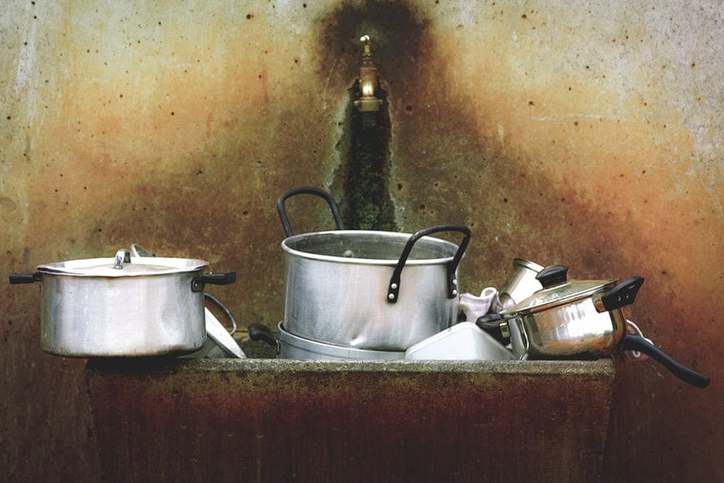
Just do the essentials for your emergency box. Good quality cookware is found at thrift stores, yard sales and other such outlets. Please- don’t go spend your hard earned money to buy these items NEW for your emergency box. Just look around and you will soon find some for a few dollars at thrift stores or yard sales.
Use the kind that can go into the oven too. (NO plastic handles). You want the most versatile cooking items you can find - things that could conceivably go from camp stove to open fire or solar oven if need be.
One other word. If you google camping cookware or if you look on ebay for such - you will find a lot of lightweight cookware that you would NEVER want to use for any length of time. It might be alright if you are hiking and carrying everything on your back - but that isn’t what we are talking about here.
If you are considering something that you might need to cook on at home or in a camping situation for a couple of weeks then find some quality used stovetop to oven type cookware.
Some examples of quality cookware names:
- Lodge,
- Farberware,
- Kitchenaid,
- Chefmate,
- Wearever,
- Rachel Ray,
- Revere Ware,
- any heavy cast iron,
- Emeril cookware.
EXAMPLE COOKWARE NEEDED
These are just examples. If you are at a yard sale and just don't know, pick up the pot - does it feel heavier in your hand? Does it have a kind of balance in your hand? Is it clean? If it is clean and feels heavy - see if you can determine where it was made. Stay away from light weight, plastic handles, non stick, thin and no name cookware. Stay away from chipped, broken, loose handles, non stick, caked on grease or dirt.
I have really struggled with whether or not to include links here. Hopefully, you know what I am talking about - but then again, you might not, just please, don't buy new pots and pans for your emergency box - unless you just have some money to burn. Anyway, whatever cookware you use in your emergency box will likely become scorched with black smoke marks. That's just the nature of emergency cooking.
Again, no need to write these down - there is a printable list at the bottom of this post. Simply print it and use it to check off what you have/don't have.
- 1 cast iron 9” frying pan
- 1 9” stainless steel frying pan
- 1 2 quart sauce pan
- 1 8 quart stock pot
- 1 9x12 baking dish
COOLER
Since we are talking about emergencies. It goes without saying that you need a good cooler and some ice. Do not depend on being able to go purchase ice in the event of a large scale emergency. That probably isn’t going to happen - ice will be one of the first things to run low. Make your own and store it if you have room.
You know those heavy duty plastic pitchers that orange juice comes in? How about a milk jug? You can fill those with water after you rinse them out good and freeze them. Perfect for putting in your cooler during an emergency. Cost - $0! (The best news of all!).
Those new super duper EXPENSIVE coolers are all the rage (with a name that sounds like Bigfoot)- surely they work well - but honestly, keep your money. I can recommend this cooler, I've owned it for years and it does great! Things stay cold for a full week in there with very little input from me.
In fact, in the hot car my cooler of food for the beach stayed perfectly cool for an entire day with only 3 milk jugs of frozen water in the cooler!
YOUR EMERGENCY TABLE
Imagine that you are in an emergency. What if a tornado threw a tree on your house? That very thing happened to some folks in this county last week.
Suppose you were basically camping while things are repaired? Would you want to go to a shelter or hotel, I would want to be RIGHT HERE keeping an eye on things. I'm bossy like that. You might be too.
One thing that gives comfort is little touches that feel like home. Things like a light at the kitchen table and a tablecloth over the table.
Two things to keep as a MUST HAVE in the emergency kitchen box:
- A vinyl tablecloth - makes cleanup a breeze on a picnic table and is much more comfy. Inexpensive dollar store purchase. Make sure to pick up the clips that hold it down to the table too.
- Something to light the table with. Two of these kerosene lanterns work well. Just keep extra fuel . (The fuel can be bought at Wal-Mart)
OTHER CONSIDERATIONS FOR HOW TO SET UP AN EMERGENCY KITCHEN BOX
Of course there are other items that will complete your emergency kitchen, depending on needs. If you live in bear country, you might need to consider hanging any extra food in a tree. That would require the appropriate rope/ bucket/ etc.
If you want to use your emergency kitchen for camping, you will want to have your tent/e-z up style tent nearby too.
You might want to consider that after walking on an area outdoors, the grass wears off and you are left with mud - perhaps you need a small tarp to place on the ground to keep feet dry.
You might want to include a whisk broom, plastic wine glasses, large drink tumblers or any number of other items.
What I have included here is simply the basics that I keep myself. You make decisions about what works for you.
So think it through carefully, what would your family need? What is absolutely essential? Find it, put it in your box and keep it safe.
What I really want to know is - what did I forget? I know you know! Leave me a comment and share so others can pick up on the ideas too.
FREE PRINTABLE CHECKLIST
For your free printable check list, just click the photo below and you will be taken directly to the page for printing!
OR JUST CLICK HERE FOR FREE PRINTABLE
IF YOU ENJOYED THIS POST, YOU MIGHT ALSO LIKE MY POST:
HOW TO CAN WATER FOR EMERGENCIES
I HAVE FOUND SOME OF THE FOLLOWING ARTICLES PARTICULARLY INTERESTING AND HELPFUL, YOU MIGHT TOO:
The One Year Pantry Layer by Layer
10 Rules for an Emergency Food Pantry








Tami says
I did not see dish soap. we have a foot locker that we used for years for camping and it is still with us!I keep the coffee in the peculator,along with a few tea bags and hot chocolate for space saving. personally, I also have toilet tissue in a huge zip lock bag, and a small first aid kit. we keep our clothes, a larger first aid kit in a canvas bag on top of it. Bar soap, a few cans of easy food, a few spices,done! A tarp is on top.I also included an oven mitt. Hot pans... I try to go through it once a year , but could just as easily when the time changes.
We also have another smaller lock on lid container with emergency stuff and water. We have been through some huge earthquakes but have moved to the coast area where there are tsunami signs all over so... I keep a collection of emergency crates that can be thrown into the back of the truck.
p.s. We had a bookcase at the end of our garage for just such. tents, sleeping bags, Coleman stove, tarps,bottoms shelf was the footlocker. there were also fishing poles hanging from the ceiling so..... also, we always have an overnight bag with medication, extra glasses and toilet articles in them....
Wendi Spraker says
Thanks for sharing!
Robyn says
I keep a couple lighters and a box of matches in mine. Also bars of hand soap.
Wendi Spraker says
Great ideas Robyn! 🙂
Lois says
Dehydrated fruit for a nice sweet treat.
Wendi Spraker says
It really is. Thanks Lois for leaving a comment!
Rebekah says
Great list. I've been camping since infancy, sometimes for weeks or months at a time (not due to homelessness). I keep a draw-string net bag large enough to put my dishes and utentsils in to rinse and hang dry, and a bar of hand soap inside a long sock or heavy nylon stocking to be tied to the handle of my water jug. The hand soap can be used while inside the sock. No dirt to dig out of the soap after someone drops it. Sometimes it's easier to take washed dishes to a water supply in the net bag for rinsing than it is to haul the necessary water for a good rinse. I would make sure one of the serving spoons is slotted. A vegetable peeler is always nice to have and not very large.
Wendi Spraker says
Hi Rebekah, Thanks for adding great information!
Kathy says
Thank you for your extensive list!! I would include waterproof matches &/or butune lighters to start fires. As well as fire starter in case these things fail. Living in SE Texas we have had our share of hurricanes/flooding & these things are invaluable as well as the items on you list.
Moxie says
This would have come in so handy for the people who were flooded out in Texas this year. I hope that some of them read it and got ready!
L. L. says
Don't forget your hand can opener! Toilet articles as well as all medical needs. I also have a washboard! We have had to do without power too many times!! Good job!!
Wendi Spraker says
You are exactly right and when I sit down at my desk to do some other things later this week, I will go over your list and add as needed, if that is OK with you! Thanks for your input! (I see can opener is already on the list - and now that I think about it - toilet items and a washboard probably wouldn't go in your kitchen box - but would definitely go with your other emergency supplies).
Mary says
Goodness Girl, you have given me a lot to think about! This is an excellent post....love all the explicit information you have provided! Thank you for all the time and effort you put into this post. Pinned. Making extra printed sheets to give to family and friends. Have a good week. Thanks again for this post.
Wendi Spraker says
Hey there Mary! Thanks so much for the commment! I guess that as a nurse, I just like to be prepared - and I want other people to be prepared as well! I hope this helped in some way and if you have any questions or suggestions - just lay them on me! 🙂 Have a great week Mary!